Welcome back to my personal blog!
In this blog post, I will introduce a couple of tools that you can use to analyze malware behavior at home. You will require a computer that can handle 2 virtual machines at the same time, so that we can create an infected machine and another machine which will act as the gateway for the infected machine. This second virtual machine will let us capture and analyze network packets sent by the infected machine. This guide assumes you’ve done the static analysis on the file and you’re trying to figure out what the malware exactly does, before trying to reverse the binary.
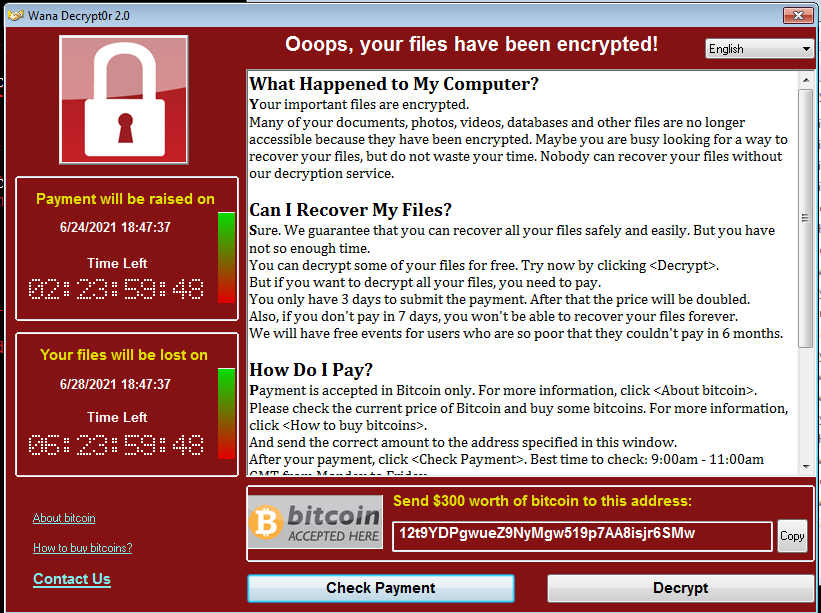
Note : You can use theZoo to find malware samples, in this post we will analyze the WannaCry ransomware. Please do not run/download any malware directly on your host OS, this may result in data loss and acute nervous breakdowns.
I’m not responsible for nuclear wars and your computer becoming firewood for winter.
Requirements:
- A computer that can handle 2 Virtual Machines at the same time
- A malware specimen (check out theZoo!)
- An older Windows image for your preferred virtualization software
- Your preferred Linux distribution’s virtual image (debian based would be better)
- On Windows machine: Python, Noriben, ProcMon
- On Linux machine: inetsim, Wireshark
Before we set this all up, let me demonstrate what we’ll do with a badly drawn picture:
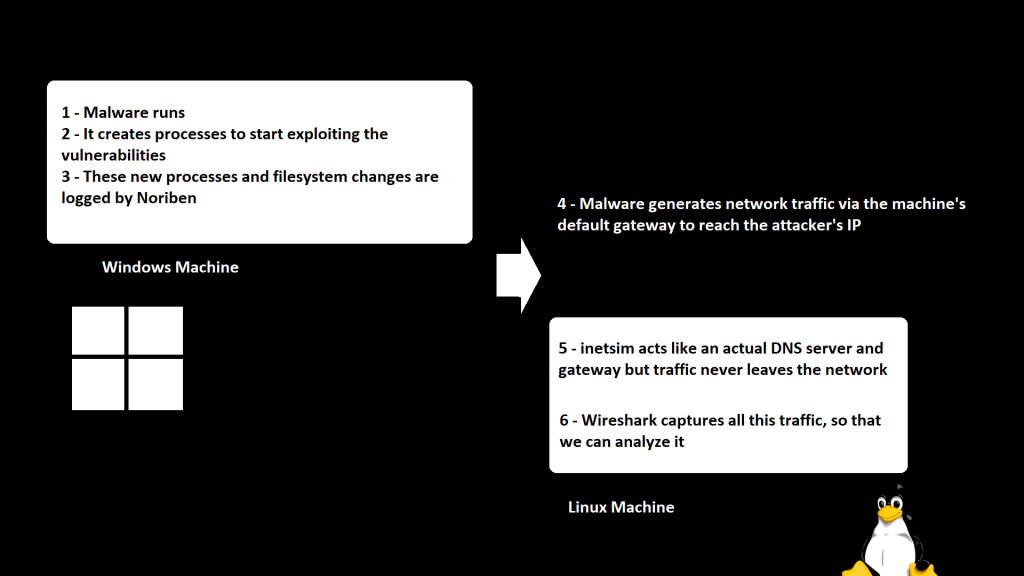
Now this might look a little disencouraging if you’re a beginner and just want to have fun. But I will try to walk you through all of these in a simple manner.
To install the requirements, we need to download them onto the Linux machine and then transfer them to the Windows machine. This is because older versions of Internet Explorer is blocked by many websites, since it is commonly used to exploit vulnerabilites.
Let’s grab the python (Python3) package for Windows from its official webpage. Then we’ll need to clone the Noriben and Yara-Rules repositories from GitHub, on our Linux machine.
1
2
3
4
5
6
7
8
// These lines will install git if you don't already have it
sudo apt update
sudo apt install git
// You should install python on the Linux machine as well if you don't have it
sudo apt install python
// These lines will clone the Noriben & Yara-rules repo which is optional
git clone https://github.com/Rurik/Noriben
git clone https://github.com/Yara-Rules/rules
I’ve created a folder unironically named “WinMachine” on my Linux desktop and I will store the files needed there for this guide. Now, Noriben needs ProcMon to function, which stands for Process Monitor and does exactly what the name states. This is a tool that was first published by Sysinternals and is now used by Microsoft as well. Let’s grab the file from Microsoft’s official website. Then we need to copy the contents into the Noriben folder, in order to make Noriben perform properly. I’ve also compressed the whole folder after this, for easy access from the Windows machine.
We’ve talked about Yara in a previous post. Yara will let us narrow down our search in this example by matching strings from created files in the system.
Let’s get our malware sample from theZoo on the Linux machine. You can grab any sample you want that targets Windows systems, but for this guide I’m using the famous WannaCry. Additionally you can do a checksum for the file you’ve downloaded to make sure it’s not tampered with.
Now we need to install Wireshark and inetsim on our Linux machine. You can install Wireshark using apt, the built-in package manager in debian based distributions.
1
sudo apt install wireshark
For inetsim, simply go to this link and download the latest version. You will get a tarball (.tar.gz format). Extract it using the following command in the same directory.
1
tar -xzvf inetsim-1.3.2.tar.gz
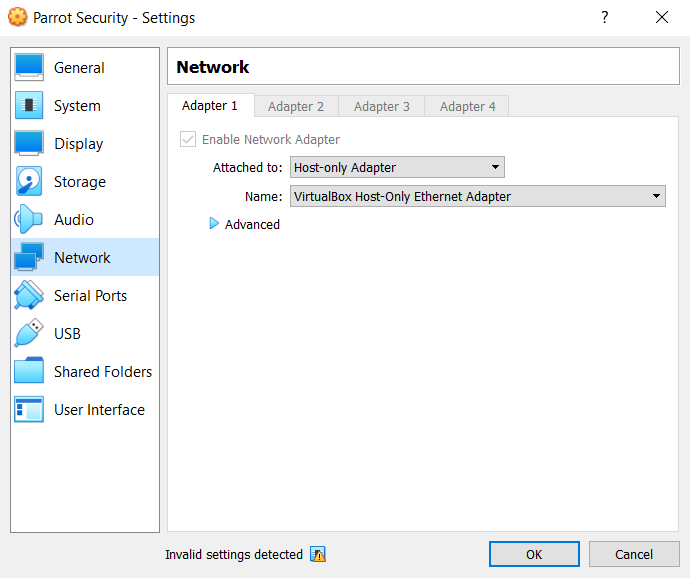
This command will extract the contents of the file, so that we can run inetsim to simulate basic network features on the Linux machine. Then let’s take our virtual machines off the network by going into the network settings of your VM software. You need to perform this change on both of the machines. Simply change the network interface to “Host-only Adapter”.
Then we need to put the two machines into the same network by changing their IP addresses. In the Linux machine, you can use ‘ifconfig’ or ‘ip addr’ to make these changes, I will only demonstrate the ifconfig here.
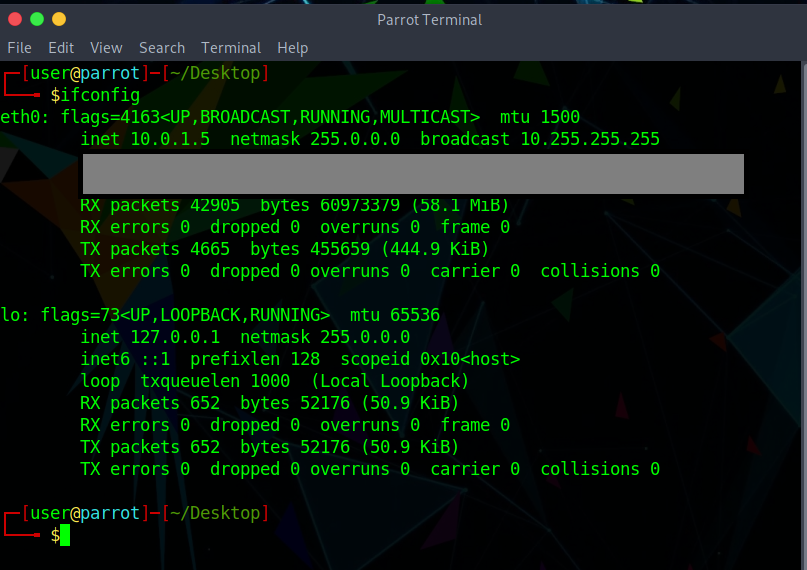
When you run the ifconfig command, it gives you the network interfaces that are attached to your computer, in this case the virtual machine. Since “lo” is the loopback address, we will need to configure eth0’s IP address as ‘192.168.1.10’.
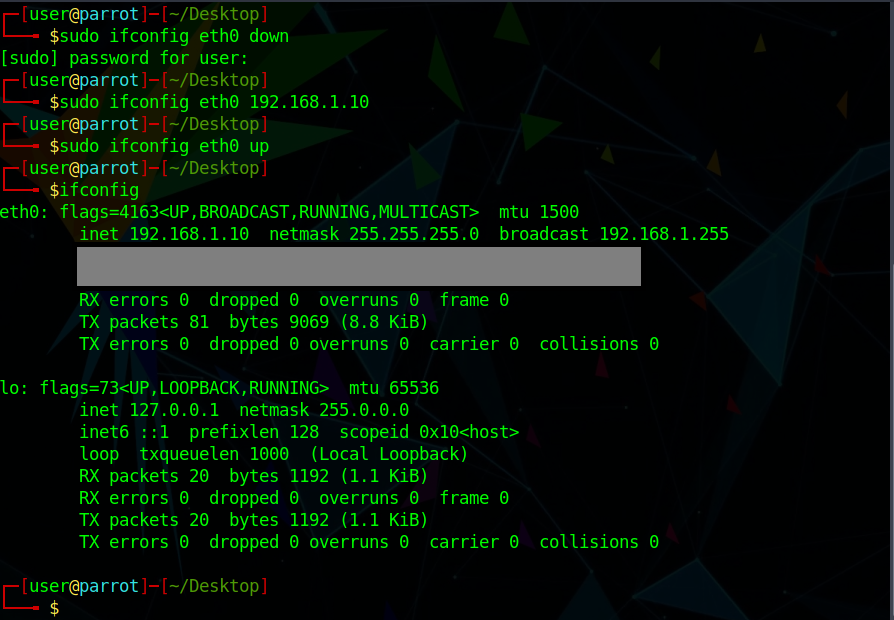
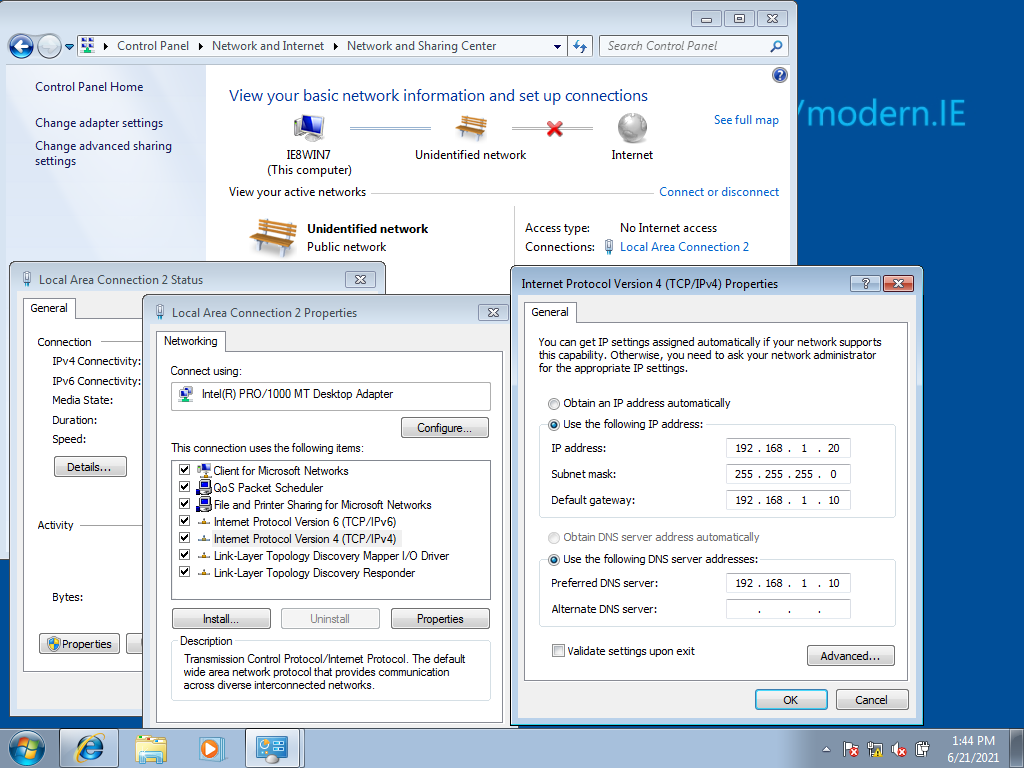
After bringing the interface down, changing the IP and bringing it back up, you should see that the IP address of the interface has changed. Now let’s configure the Windows machine. By now it should be on Host-Only Adapter mode. You can configure the Windows machine’s IP as 192.168.1.20 and the default gateway as shown below.
You should be able to ping the Linux machine from the Windows machine now. Open up a commandline on the Windows machine and try the following.
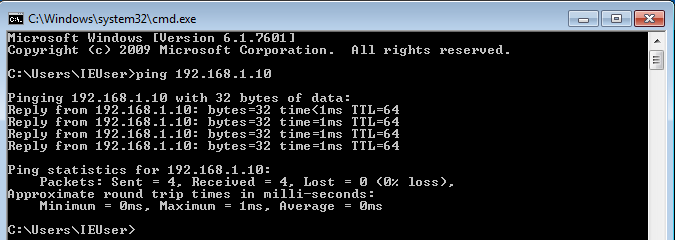
If for some reason the ping doesn’t work, this means there is no connectivity between the machines and you would need to troubleshoot the problem.
Now let’s serve our file directory on the Linux machine. You need to open a shell in the directory you’ve stored the Windows files and do the following.
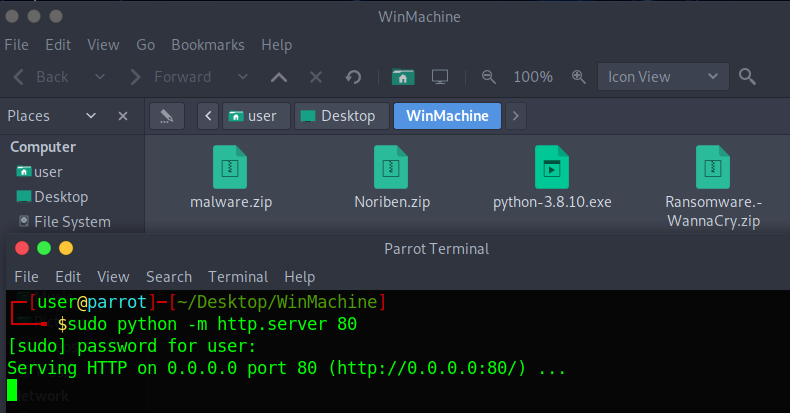
Now, since we’ve setup the Linux server’s IP as 192.168.1.10, this python command will run a basic http server on that IP. You need to open a browser on the Windows machine and go to 192.168.1.10 as shown below.
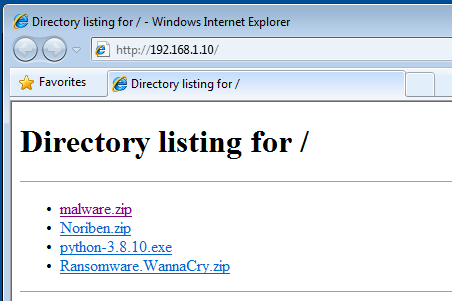
If you see the directory listing, this means you’ve configured everything correctly so far. Time for a KitKat!
There are a couple of things left to do on the Windows machine.
- Download the files from the Linux machine’s server
- Disable Windows Defender
- Install Python (Add to PATH as well)
- Extract Noriben and Yara Rules if you’ve archived them like me
- Take a snapshot of the Windows VM if you want to use it again in the future
Before running any malware, let’s configure inetsim and Wireshark on the Linux machine.
To run inetsim, go to the directory you’ve extracted it into, then open up a shell and type:
1
sudo inetsim
Yep, it’s that simple. You should see a lot of output from inetsim saying it’s starting all the services for you.
Next, let’s open up Wireshark with the shell to run it as root.
1
sudo wireshark
When you open up Wireshark, you should be met with the capture interface. Select the interface you need to capture the network flow in (eth0 in this case). It will start capturing packets for you.
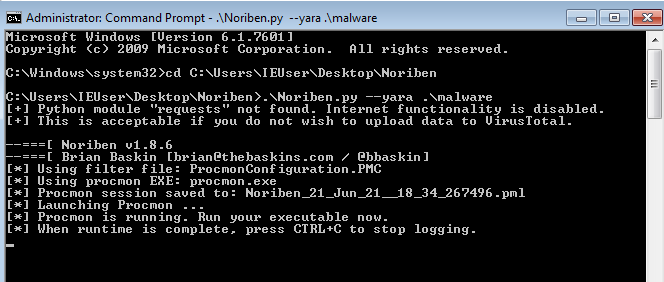
We will need to start Noriben as well, before running any malware on our poor Windows machine. You need to start a commandline with admin privileges, change the directory to where Noriben resides and then run Noriben with the optional yara flag. After the yara flag, you need to specify where you’ve put the yara rules in. In my case it’s in a folder named ‘malware’.
If we’ve configured everything correctly, we should be ready for the fun part. Execute the malware with admin privilieges and watch the world burn, without actually burning it!
In depth analysis of all the files you get in the end of this, is actually where the real work begins. However it will not be covered under this post, because this post has been long enough. Using this setup, you should be able to capture network packets and processes created by a malware, further helping you understand the goal of an attacker. Stay tuned for more and please get vaccinated before you get infected! (Jokes aside, update your systems)
Taken from our old blog over at hackerspot.net, written by me.